Saturday, May 26, 2012

Sun Oven Part Two: Moisture tips and tricks

Before I do our next Sun Oven installment, let me remind you that our awesome sales all end Tuesday May 29th at 10am. Harvest shelves, gluten free packages... you don't want to miss out. Contact me right away to place your order and get that special pricing.

Now on to the Sun Oven! I have been using mine A TON lately, and I love it!  I love the piece of mind that comes from knowing I have my Sun Oven, as well as the freedom I feel at being able to bake my favorite things even during the AZ summer. So do yourself a favor and contact me to buy a Sun Oven today, so you can save money on your electric bill now, practice your solar baking skills, and later, when you NEED to cook without electricity, you will already be a pro. As a reminder, if you order directly through me and my virtual party, here's what you get with your sun oven:


Free accessory pan(s)
+
 $28.21 in free product
+
Ability to cook without needing electricity, gas or propane
+
A way to save on your electric bill and keep your house cooler in the summer
+
Peace of mind from being prepared for emergencies 
________________________________________________
All for the price of $282.14 plus applicable tax and shipping


So enough business chit chat. Let's get to the tips and tricks. In part one of this Sun Oven series, we went over general info. Today's we'll be talking about moisture. Regular ovens have vents and exhausts built in to them. As you cook food, the moisture it contains escapes as steam through these vents. If something is cooked too long, the moisture will all cook out, and it will become dry, crispy, or burnt. The Sun Oven, however, does not have any vents. As such, all the moisture of your food stays in the oven (as long as the door stays sealed shut). Here are some of the major benefits to a moisture-retaining sun oven:

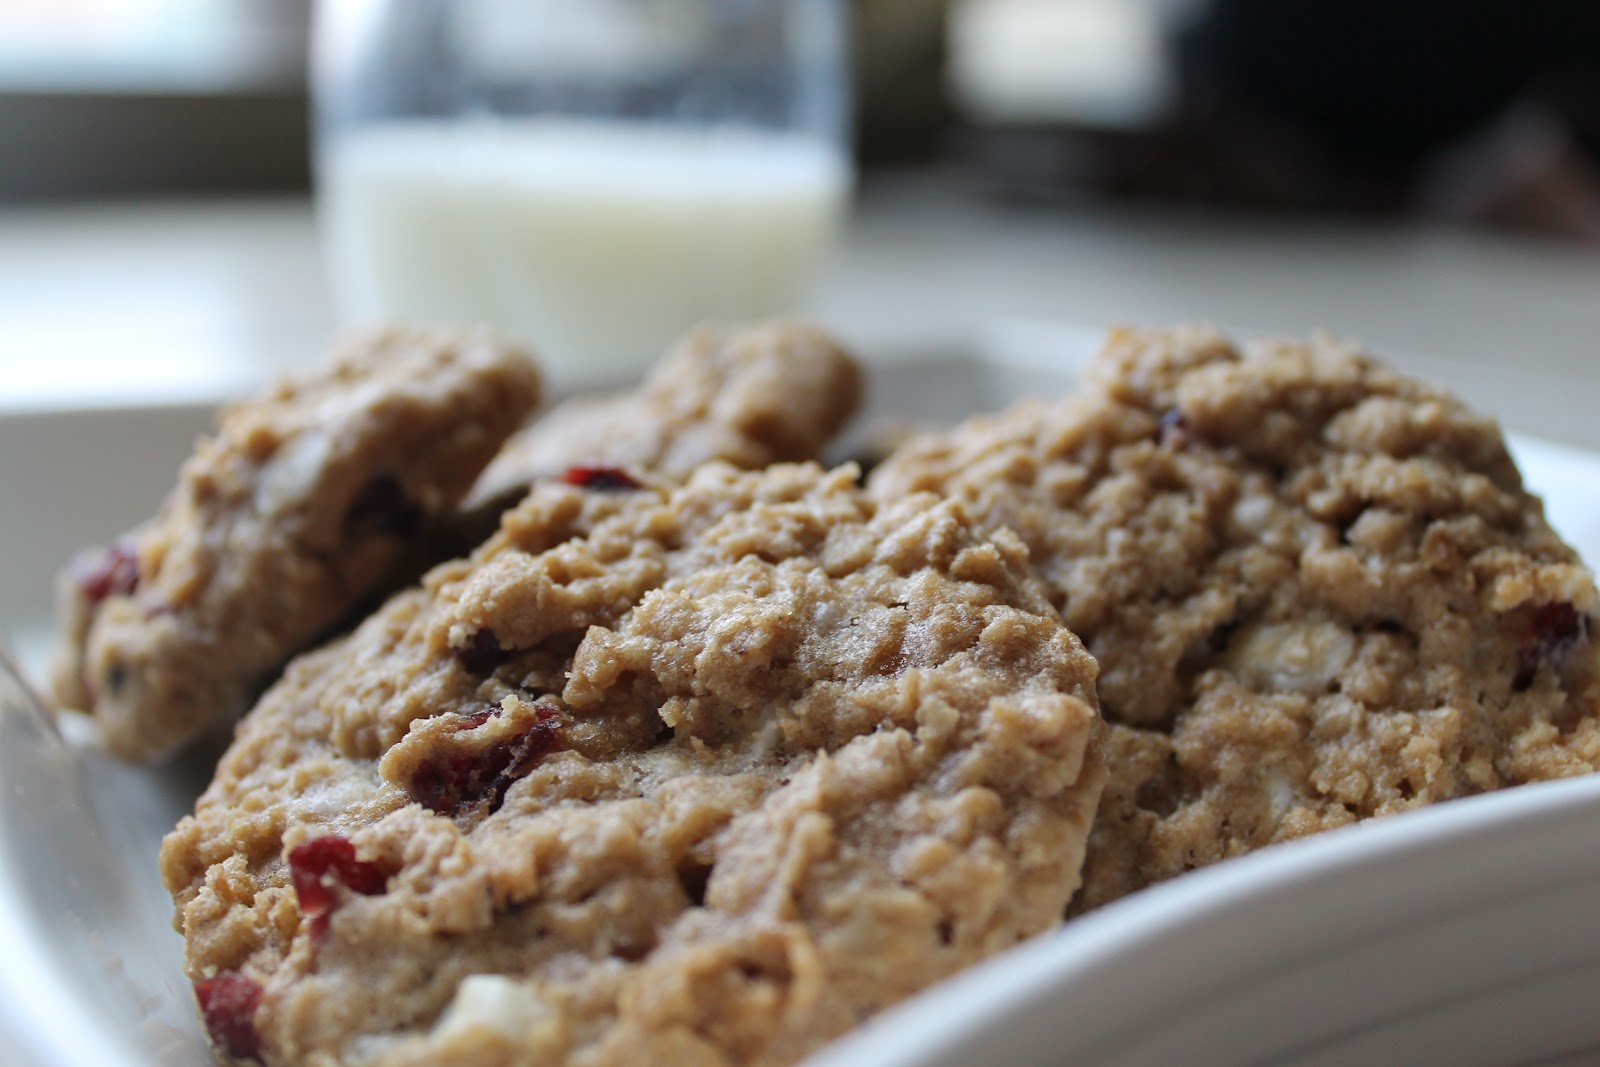
  •  Meats and Baked Goods stay really moist and tender. Woohoo! Want your cookies to be the chewy gems of the party? Bake them in the Sun Oven!  These White Chocolate Craisin Oatmeal cookies were cooked on a partially over cast day (lower temperature than normal) for about an hour (longer cooking time than normal).  They were so tender that my husband actually preferred them to the batch I baked in my regular oven for comparison.  
 
  • You don't need to use as much water when cooking many recipes. You can use an entire 1/3 less liquid on recipes that have added liquids (Don't reduce the liquid in baked good items, however.) Here's an example: I grabbed my roasting pan and put in 2 cups dry rice, 2 cups raw broccoli, 2 cups raw cauliflower, and then topped it with 2 raw chicken breasts (cut into 3 pieces each). Normally, I would need to add 4 cups of water to cook all that rice, but since it's in my sun oven, I can use 1/3 less. So I added  2 & 2/3 cups water (with some salt and seasonings mixed in), poured it over the top of my chicken, veggies, and rice, put it in the sun oven at 11am, went about about my day, checked back on it at 1:45, and it was done. Here's how it looked: 
Raw ingredients
1/3 less liquid, everything cooked all at once for less than 3 hours, and the chicken was done, the rice was moist,  the veggies were tender. 
  • It is hard to burn things. If I left my macaroons in the regular oven 5 minutes too long, they would be burnt. In the Sun Oven, the difference is negligible. That being said, if you forget about something completely (out of sight, out of mind), and you leave it in there HOURS longer than you should, it might not be as palatable. But as long as you remember to set a timer inside, so you remember to go check on your oven outside, you should be fine. 
  • Because there are no vents, the air inside the chamber heats consistently throughout. This means you can actually hard boil an egg without any water. Just preheat the sun oven to 300+ degrees, place a dozen eggs in their cardboard carton (without lid) in the preheated oven, lock the door, come back in 35 minutes, remove the carton, and they will be done. I put mine in some ice water afterwards, to ensure easier peeling. Here's how they came out:
Paper burns at 451 degrees farenheit, and your sun oven won't get much over 350, so cooking them right in their cardboard carton is perfect. 
Easy to peel, and they taste wonderful. In fact, my husband was surprised to learn they had been "boiled" without water in the sun oven. He assumed they were just cooked on the stove top like normal!

Now, the moisture retention does create a few problems, the largest being condensation. Even with the lid on the roasting pot, when I went back about 3 hours later to check on the veggie/chicken/rice dish mentioned above, here's what I found:


Because of the fogged up glass door, the light wasn't reflecting into the cooking chamber effectively. As a result, the over all temperature had decreased to 200 degrees. I have been researching how to remedy this, and have read that if you place a dark tea towel over the dish, then add the lid, and the towel will absorb most of the excess moisture that would otherwise form pesky condensation. I haven't had a chance to try it yet, but I read the tip on the manufacture's website, so I am pretty confident it will work. Just to be sure though, next time I cook a high moisture food, I will be sure to use this tip and report back.

Another way to get rid of condensation is to just quickly open the door, let some moisture out, then close it again. Do be careful with that method though. It lets out the moisture, but if you forget to come back and check on your food, the decreased moisture lends itself to easier burning.


Rest the door on top of the latches instead of locked underneath to allow moisture to escape
  and turn your sun oven into a dehydrator!

Now, along the lines of opening the door to let out moisture, let me throw in here that if you rest your glass door ON TOP of the thumbscrew locks, (see picture above) instead of under them to seal it shut, you have transformed your Sun Oven into a dehydrator. Keep your oven at or under 200 degrees, place whatever you want to dehydrate on a rack that will allow air flow all around the food, prop the glass door on top of the thumb screws to allow moisture to escape, and let the sun slowly dry your food all day. You can make your own dried fruit, or sun-dried tomatoes like the ones I made this weekend. I am still fine tuning the process, and when I do, I will give you a more detailed set of instructions. Meanwhile, here is a teaser photo:

Sun dried tomatoes....literally!


All in all, the moisture retention of the Sun Oven is a wonderful benefit that when correctly harnessed, produces pretty awesome food. You use less water to cook (a major plus for limited water water supplies in emergency situations). And you do it all without electricty, propane, or anything but the sun itself. Order a Sun Oven today, I promise you won't regret it. You can contact me at ThriveWithHemsath@gmail.com or 714-683-7562.

Monday, May 21, 2012

Sale deadline Extended! Gluten free package, harvest shelves, and more!

There are a few sales going on with Shelf Reliance right now that were supposed to end today, but they have been extended until May 29th at 10am (MDT). Woohoo! If you didn't see them before, here is the information on all of the current sales.  Remember to order through me directly to get these great deals -- you won't get the same price off the website. You can contact me at ThriveWithHemsath@gmail.com or call me on my cell phone at 714-683-7562.


The first sale I am most excited about is the Harvest 72" #10 Shelf. (ID: 11949) Regularly $264.99, this Food Rotation System is on sale for only $229.99With Shelf Reliance's FRS, the first can you put in is the first can that comes out.  The Harvest 72" #10 shelf will hold up to 112 #10 (gallon-sized) cans, with 16 different tracks (7 cans per track).  It also comes with 58 food label magnets to help keep you even more organized. Height 72"    Depth 24.5"    Width 36.5" 

For those asking about Gluten Free Items, we are having a special on our gluten free package. All the items in the package come in #10 cans and are certified gluten free by the GFCO at a rate of 10ppm or less (which is more strict that the FDA standard of 20ppm). 
Gluten Free Package  (Catalog ID: 25432)

Regular Price: $1684.34   Sale Price: $1396.49


Contents
12 White Rice

6 Millet
6 Cornmeal
6 Rice Flour
4 Quinoa
6 Amaranth
1 Sweet Corn (FD)
1 Broccoli (FD)
4 Carrot Dices
2 Chopped Onions
2 Split Green Peas
1 Potato Dices (FD)
3 Green Peas (FD)
6 Potato Chunks
6 Tomato Powder
2 Bananas (FD)
2 Strawberries (FD)
2 Raspberries (FD)
6 Apple Slices
1 Pineapple Chunks (FD)
1 Blueberries (FD)
1 Blackberries (FD)
6 Powdered Milk
4 Cheese Blend
4 Chocolate Drink Mix
6 Whole Egg Powder
1 Black Beans
6 Pinto Beans
3 Lentils
2 Lima Beans
3 Chicken TVP
3 Bacon TVP
5 Taco TVP
2 White Sugar


Another awesome sale we have is the Ultimate Veggie Package (ID 25355). Regular Price: $378.00. Sale Price: $323.40.   That is a savings of almost $55 - Sweet! And speaking of sweet, you'll notice in the package contents that some of the veggies say sweet, but rest assured, they are only the way nature created them. Our THRIVE Veggies have no added sugars, salts, or other preservatives. Here is what you get (all in #10 cans) with your Ultimate Veggie Package:
3 Sweet Corn (FD)

3 Sweet Potatoes
2 Green Peas (FD)
2 Cauliflower (FD)
2 Potato Chunks
2 Red & Green Bell Peppers
2 Broccoli (FD)
1 Chopped Onions
1 Split Green Peas
4 Carrot Dices
2 Spinach (FD)
4 Potato Beads
2 Potato Dices (FD)

*(FD)= Freeze Dried

We're also having a sale on the H20 Reserve 20 Pack - ID 25442.  Sale Price: $117.59   Regular Price: $134.26 
The H2O Reserve is a heavy-duty Mylar bag perfect for your water storage needs. It can hold up to 5 gallons of water and comes with a built-in easy pouring spout. The recommended amount of water storage is a gallon of water, per person, per day. So this 20 pack of mylar bags would be enough to store a 2 week supply of water for a family of 4. 

Here are some other sale items you might be interested in: 
White Rice Bucket - ID 24119   Sale Price: $37.29   Regular Price: $47.09
Wheat Flour Bucket - ID 24117   Sale Price: $37.29   Regular Price: $45.08
Chicken TVP Bucket - ID 24559   Sale Price: $47.09   Regular Price: $56.89
Beef TVP Bucket - ID 24558   Sale Price: $47.09  Regular Price: $56.89
Water Filtration Bottle 12 Pack - ID 25416   Sale Price: $131.29   Regular Price: $173.49 
1 Year 4 Person Package - ID 25348   Sale Price: 2792.99   Regular Price: $3308.29
Contents
6 Six Grain Pancake Mix
6 Germade
6 Quick Oats
6 Nine Grain Cracked Cereal
36 Hard White Winter Wheat
6 White Flour
9 Whole Wheat Flour
6 Cornmeal
6 Elbow Macaroni
18 Instant Rice
8 White Rice
6 Pearled Barley
16 Potato Chunks
6 Sweet Corn (FD)
2 Broccoli (FD)
2 Carrot Dices
6 Green Peas (FD)
3 Split Green Peas
2 Chopped Onions (FD)
2 Chopped Onions
4 Sweet Potatoes
6 Red & Green Bell Peppers
2 Pineapple Chunks (FD)
4 Raspberries (FD)
1 Blackberries (FD)
1 Blueberries (FD)
4 Apple Slices
6 Strawberries (FD)
4 Apple Chips
2 Banana Chips
6 Chocolate Drink Mix
24 Powdered Milk
6 Cheese Blend
3 Taco TVP
6 Bacon TVP
6 Beef TVP
3 Sausage TVP
3 Sloppy Joe TVP
6 Chicken TVP
3 Ham TVP
6 Lentils
12 Black Beans
6 Kidney Beans
14 Pinto Beans
6 Whole Egg Powder
6 Orange Bliss
4 Simply Peach
6 Orchard Apple
2 Beef Bouillon
2 Chicken Bouillon
1 Baking Powder
1 Iodized Salt
2 Brown Sugar
4 White Sugar
6 Fudge Brownies
Cookbook


Remember that all of these sale prices end on May 28th at 10am (MDT), so don't wait to place your order. Contact me right away to start saving and start being prepared! And don't forget to talk to me about hosting a party, even if just a "virtual party" so you can earn 10% of your purchase back in free product.  

Tuesday, May 15, 2012

Giveaway: 72" Harvest Food Rotation System

**(5/16/12) IMPORTANT UPDATE!!! From now until May 20th, those who want to purchase their own Harvest 72" System can do so at a super sale price.  If you want the one that holds all #10 cans, they are on sale for only $229.99!!! That's $35 off the normal price! So hurry and order yours fast by contacting me at ThriveWithHemsath@gmail.com.**

Hey everyone. I am busily researching, experimenting, and drafting part two of my Sun Oven blogpost. But in the mean time, I wanted to let you know about an awesome opportunity. The main Shelf Reliance Blog (http://www.shelfreliance.com/blog/index.php/2012/05/15/win-harvest-72-food-rotation-system/) is doing a giveaway right now.


The contest runs through May 31st, and the winner will receive a FREE 72" Harvest Food Rotation System. At six feet tall, three feet wide, and two feet deep, these things are amazing! They can be customized to hold any size can from tuna fish up to the big #10 cans. The first can you put in is the first can that comes out, so no more cans getting lost and expiring at the back of your shelf.

Check out their link above for contest details, and stay tuned for more Sun Oven info on my blog here. If  you don't win the giveaway, but you really want one of these shelves, no worries. You can just order one through me. They are regularly $264.99, but if you want the kind that holds all #10 cans, they are on sale right now for only $229.99 (plus applicable tax and shipping). If you don't have a space large enough to hold a full 72" Harvest Shelf, that's okay. Shelf Reliance has tons of FRS in just about every size. Check them out, along with their prices and dimensions, by scrolling down to page 6 of the current price list. Remember, that whether you are a Q club member or not,  if you place your order through me, the price you'll pay is the one listed under "Q-Club".

Good Luck Everyone with the Giveaway! And don't forget the sale ends on May 20th!

Monday, May 7, 2012

Sun Oven - Part one: General information

How is your spring going?  May just started, and here in Arizona, we already hit triple digit weather back in April.  When it gets that hot, and you're paying to run your AC all day just to keep the house at 80 degrees, the last thing you want to do is turn on your oven and cook something for dinner. Which, among so many other reasons, is why I am grateful for my Sun Oven!


Here's the Sun Oven, all set up in my back yard. The swinging tray inside keeps my mini-muffin tin level, despite the oven being tilted up via the adjustable leg to access more sun. 


I purchased my Sun Oven through Shelf Reliance around Thanksgiving of 2011. It ships straight from the manufacturer, who happened to be back ordered at the time I ordered, so it took longer than I wanted for it to arrive (6-8 weeks if I remember correctly). But it was definitely worth the wait. I checked with the manufacturer this last week, and they are not currently back ordered, and ship orders within the week of receiving them. 

In the past few months, I have been experimenting with my Sun Oven. I have learned a lot about cooking with it, and have been compiling some tips and tricks to share with you. It will probably take a few posts. So for this first post, let me just introduce you to the Sun Oven. 
  • The whole unit weighs only 21 pounds. The reflectors are collapsible, and it has an easy carrying case, so it is quite portable. 
  • Collapsed storage dimensions: When resting on its back (so the carrying handle is on top) it measures: 13"x22" with a height of 19".
  • Internal Cooking Area dimensions: When the bottom is resting flat on the ground, the floor of the internal cooking area measures 10"x13" and the height, at the most shallow part, is 8". 
  • There is an adjustable leg in the back that allows you to tilt your Sun Oven toward the sun for maximum sunshine collecting. ("sunshine collecting" is not a technical term, but I think it works). 
  • To ensure your food lays flat even if the oven is tilted, there is a removable free-swinging leveling tray inside. The tray measures: 9.25" x 12". 
  • To use your Sun Oven, you'll peel off the blue protective film from the reflectors, and open them up, locking them open with a small thumb screw. These reflectors stay cool to the touch, even when the inside of the Sun Oven is over 300 degrees. 
  • The glass door has two thumb screw closures to keep the door locked tight against the rubber seal during cooking. These can get hot to the touch, so use an oven mitt when opening them. 
  • Also included inside is a thermometer that can register up to 500 degrees. When I first set it up, it only took about 15-20 minutes for the thermometer to read 325 degrees. Since it was winter, I was skeptical it was really that hot, so I put my own thermometer in there as well to check, and when I came back to check, both thermometers were reading 350. 
  • The Sun Oven works by reflecting the sun's rays into the cooking chamber through the sealed glass door. The outside temperature doesn't matter, but what does matter is having the direct sunlight successfully reflecting into the chamber. (So watch out for dirty reflectors, fogged up glass door, or overcast skies). The more direct the sunlight, the hotter it will get. On a clear winter's day, I got my oven up to 350. You can use the adjustable leg, as well as turning the sun oven to follow the sun's path in the sky, to make sure your oven keeps having as much direct sunlight as possible, and you will be able to maintain that higher temperature through out the whole cooking time. 
  • If you are baking something that needs to cook for a while and do not want to (or can not) continually go outside every 30-45 minutes and shift your oven slightly to follow the sun to maintain those elevated baking temperatures, that's okay. Just use your Sun Oven like a slow cooker. Simply position your Sun Oven to where the sun will be at its hottest for the bulk of the cooking time (usually south facing if you'll be gone all day). Put your food in, go to work, or to church, or wherever, and the oven will act like a big crock pot. Come home and even if the sun has set, your food will still be warm in the Sun Oven, having slow cooked all day at a lower temperature. 
  • Sun Ovens are built to last more than 20 years if properly cared for. 
  • Through Shelf Reliance, a Sun Oven costs $282.14 (plus tax and $19.99 shipping - unless you want to pick yours up at the warehouse in American Fork, UT, in which case there is no shipping fee).  On top of that, thanks to the party benefits program Shelf Reliance offers, you get 10% of your purchase as credit towards free product... so another $28.21 in free product for a later purchase.  To sweeten the deal, if you live in the continental US, and order as part of my current party, I will use my own benefits to also give you your choice of Sun Oven accessories to go with it (set of two brownie pans or a roaster pan with lid).    So you get: 
Free accessory pan(s)
+
 $28.21 in free product
+
Ability to cook without needing electricity, gas or propane
+
A way to save on electric bill and keep your house cooler in the summer
+
Peace of mind from being prepared for emergencies 
________________________________________________
All for the price of $282.14 plus applicable tax and shipping

To order, contact me now at: ThriveWithHemsath@gmail.com or call me at 714-683-7562.  Stay tuned for more sun oven tips, tricks and recipes, and take a look at some of the photos below. If you have any questions, e-mail me or comment on this post and I will try to answer them right away!

All folded up and ready to be carried  wherever you need.

Peeling off the blue protective film from the reflectors

Comes with a Polder brand thermometer that can register up to 500 degrees F.

One of two metal thumb screws used to keep the glass door locked.

The adjustable leg in the back of the Sun Oven. 


Thursday, May 3, 2012

Strawberry Lemonade Cupcakes - and new Price and sales lists

May is here, and with it, we have some new monthly specials, as well as a new Summer Price list. Check out the links and contact me to let me know what you want to order.

I know that Summer is "officially" still 7 weeks away. But I live in AZ, and we hit triple digit weather mid-April. So it really does feel like summer here. And in honor of the summer season, I decided to make some strawberry lemonade... cupcakes, that is. :-)


I was having a birthday luncheon for a friend and wanted to do something a little special for the dessert. I didn't get exact measurements of everything as I went, so this is meant more as a recipe inspiration of how to use your FD fruit, rather than an exact recipe. But I will give you some ball park amounts as I walk you through the steps.

Part One - The Batter

  • Prepare a lemon cake mix of your choice, according to the box directions. (Consider using THRIVE Powdered Eggs for salmonella-risk-free beater licking enjoyment!)
  • Punch up the lemon flavor by adding 1-2 tsp of lemon juice (according to your preference)
  • If you want extra moist cake, add 1/4 cup of either sour cream, lemon pudding, or lemon yogurt
  • Once the batter is blended, take 1/2-3/4 cup of THRIVE FD Strawberries (or more if you want) and dump them in straight from the can. Mix well, until all the berries are evenly dispersed. Let them sit in the batter to soak up some moisture while you preheat the oven (to whatever the cake mix calls for) and move on to the frosting. 
Part Two - The Frosting
  • Soften 1 stick (1/2 cup) of butter or margarine.
  • Much like potato chips or cereal, FD fruits, such as the Strawberries, experience some breakage during processing and transportation. As such, you get some crumbs or powder at the bottom of the can. I LOVE the powder in the FD fruits, and this is the perfect use for it. I think I used anywhere from 2-4 Tbsp of the strawberry powder from the bottom of the can. 
  • Combine the strawberry powder with 4 cups of powdered sugar.  I was using powdered sugar from an old #10 inherited from my Grandma. It wasn't THRIVE powdered sugar, and when I opened it, it was clumped and hard as a rock. So I had to run it through the blender, and I just blended the strawberry powder with it. But assuming you have soft powdered sugar, you should be able to blend yours nicely with just a fork. If you don't have a lot of strawberry powder in your can, you can probably just stick 1/4 cup strawberries and 4 cups powdered sugar in the blender and blend it all together until you have a pink powder.
  • Add the strawberry powdered sugar to the softened butter a cup or so at a time as you beat it with the electric mixer. (You may want less or more sugar depending on the consistency you prefer). 
  • Add 1/2 - 1 tsp lemon juice to frosting according to preference. 

Part Three - Baking and Decorating
  • Pour your batter into your cupcake liners, and bake according to the directions on your cake mix box. Let them cool completely before frosting. 
  • Frost liberally. I had enough frosting for 2 dozen cupcakes. I went too light on the frosting for the first few, and wound up with a lot left over, and had to go back and add some to some already decorated cupcakes. So learn from my mistake and don't skimp on the frosting. You can always make more frosting later if you need to, but the frosting is the best part and gives enough strawberry flavor to balance out the lemon flavor of the cake. 
  • Garnish with your choice of fresh or FD Strawberry pieces, and some sort of lemon candy (I used lemon heads here, but gummy, sugar-covered lemon slices or  lemon Starbursts would work well too). 
  • Serve and enjoy!